padding
US /ˈpædɪŋ/
・UK /ˈpædɪŋ/
B1 trung cấp
v.t./i.động từ (ngoại/nội)đệm, lót, độn thêm
Padding the bleachers will add more comfort and protection that fans would surely appreciate.
v.t./i.động từ (ngoại/nội)độn thêm (để lấy tiền)
The clinic is padding their clients with additional charges that are unnecessary
v.i.nội động từbước nhẹ
The tiger is padding after the chicken he wants for dinner
Phụ đề video

Tim Ferriss về học ngôn ngữ: Phỏng vấn Benny của Fluent in 3 months (Tim Ferriss on language learning: Interview with Benny of Fluent in 3 months )

- so if it's fragile you wrap it more, if it is not fragile at all you don't have to put in all this extra padding and packaging.
- If it's not fragile at all, you don't have to put in all this extra padding and packaging.
Nếu nó hoàn toàn không dễ vỡ, bạn không cần phải thêm lớp đệm và bao bì bổ sung này.
Hướng dẫn Auto Layout Figma cho người mới bắt đầu (2025) (Figma Auto Layout Tutorial for Beginners (2025))

- This arranges your elements vertically The third one is Horizontal It arranges your elements horizontally The fourth one is Grid This is a new update still in beta It allows you to edit the layout in a grid format We'll go over each of these in detail Don't worry, by the end of this video, you'll understand how to use every single button here Let us start with the Freeform setting You'll see W and H right below this button W stands for Width and H stands for Height You can use these fields to adjust the size of your element You can type in a number, hover over the letter and drag to change it Or do it the most organic way Hover over the edge of the element and drag until you see a number you like I like multiples of 4 To the right, you'll see a square icon If you click it, it locks the aspect ratio of the element So the width and height stay proportional Let's say you are redesigning a YouTube thumbnail A YouTube thumbnail has a specific aspect ratio So locking it can prevent your cat, your kid, and mostly you from messing it up One very, very important thing Make sure you select the right layer In a real design project, you'll have so many layers So if you want to lock the aspect ratio of this circle, let's say Make sure to select the circle, not the frame That way, your circle will stay perfectly as a circle Not too fat, not too short Below Width, you'll find a field to adjust the gap between elements This only appears in freeform mode when your elements share the same gap At the bottom, you'll see the clip content checkbox This is super helpful when your frame is smaller than the elements inside For example, in a carousel design Checking clip content will hide the parts of the elements that extend outside the frame Alright, next let's move on to vertical and horizontal layouts These two are really similar So let's take a look at the horizontal one When you select a horizontal layout A wrap icon will appear on the right If you click it, the elements inside the frame will automatically wrap into multiple rows Perfect for when there's not enough space in a single line Below that, you'll see width and height settings Each with a drop-down If you click the drop-down, you can set the size to hug This makes the frame automatically adjust to fit its contents For example, if you add a new circle to the frame The width will automatically expand to hug the new element You can also set minimum or maximum values for width and height Let's say you don't want the frame to be wider than 750 pixels Just set the max width to 750 And even if you add more elements, the frame won't go beyond that limit Right below width, you'll see nine alignment options for your elements inside the frame These let you align your content to the top, center, bottom, left, right Basically any corner or edge you want You might not notice much difference right now if your frame is hugging the elements But once the frame is bigger, this alignment will become very obvious Next is the gap setting Click the drop-down and you'll see an option to set it to auto This automatically adjusts the space between elements to fill the frame evenly So satisfying to see everything snap into place Below that are your padding settings Padding is the space between the edge of the frame and the element inside it By default, padding is applied equally on parallel sides But if you click the little toggle next to it, you can customize the padding for each side Just like this Next, let's move to grid A brand new and still in beta feature in Figma Alright, I have a love-hate relationship with this, okay?
Điều này sắp xếp các yếu tố của bạn theo chiều dọc. Tùy chọn thứ ba là Horizontal. Nó sắp xếp các yếu tố của bạn theo chiều ngang. Tùy chọn thứ tư là Grid. Đây là bản cập nhật mới vẫn đang ở giai đoạn beta. Nó cho phép bạn chỉnh sửa bố cục theo định dạng
- Because it was released literally one day after I finished editing my last auto layout tutorial So now here I am redoing everything all over again and throwing my last edit to trash But hey, it's a powerful feature With grid, you can snap your elements into a clean grid layout You can also set your elements to span multiple rows or columns Think about designing bento boxes on a website But I still don't like bento box, bleh You can also manually adjust the width and height of each row or column Like this On the right panel, you'll find controls to set up as many rows and columns as you want Just click this big grid thingy And with the grid layout, you can also select the element's unit And set their width and height to fill container I love this setting Now, whenever you change the gap size or resize the frame All the elements will adjust automatically to fill in those grids So satisfying There is one more button The auto layout settings button on the right Click this opens more controls Let's try an example by adding a thick stroke to these circles By default, the stroke will go outside the frame If you change the dropdown to include the stroke in the layout The strokes will stay inside the frame So this is what it does I actually haven't had a chance to use this Now, let us set the gap between elements to a negative number Think about Instagram like where the profile pictures overlap You can use the dropdown here to switch between Whether you want the first or last element to show on top Just one more setting left For this one, let's add an icon and some text If you use auto layout, they'll align automatically And if you make the text bigger, the layout will adjust like this But if you turn on align text baseline The icon will align with the baseline of the text No matter how big or small the text gets However, this doesn't work well with icons that have padding inside Which is like all of the icons I use So I don't know how to use this Now let's talk about using auto layout in a real-world scenario This is really really important So pay attention Take this YouTube card element as an example How would you fix this layout using auto layout?
Vì nó được phát hành chỉ một ngày sau khi tôi hoàn thành việc chỉnh sửa bài hướng dẫn tự động bố cục cuối cùng của mình. Vậy là bây giờ tôi phải làm lại mọi thứ từ đầu và vứt bản chỉnh sửa cuối cùng vào thùng rác. Nhưng mà, đây là một tính năng mạnh mẽ. V
Mỗi Nhà Nhỏ Là Một Gói Khác Nhau Trong The Sims 4 | Phần 2 (Every Tiny Home is a Different Pack in The Sims 4 | Part 2)

- The wood color on this chair that matches with the other small chairs has a different colored padding on it.
Chiếc hộp của những tiếng meo meo.
- Has a different colored padding on it.
Có lớp đệm màu khác trên đó.

Cánh Cửa Qua Không Gian [1/2] Video / Audiobook Của Marion Zimmer Bradley (The Door Through Space [1/2] Video / Audiobook By Marion Zimmer Bradley)
![Cánh Cửa Qua Không Gian [1/2] Video / Audiobook Của Marion Zimmer Bradley (The Door Through Space [1/2] Video / Audiobook By Marion Zimmer Bradley)](https://img.youtube.com/vi/wKQQmSV2WGY/hqdefault.jpg)
- Kharsa were hunting down a thief. I heard the shrill cries, the pad-padding of feet
Kharsa đang truy lùng một tên trộm. Tôi nghe thấy tiếng kêu inh ỏi, tiếng bước chân
- I heard the shrill cries, the pad-padding of feet in strides just a little too long and loping to be human, raising echoes all down the dark, dusty streets leading up to the main square.
tối tăm và bụi bặm dẫn đến quảng trường chính. Nhưng bản thân quảng trường lại trống rỗng dưới ánh
9 Ba Lô Máy Ảnh Tốt Nhất Cho Du Lịch & Vlogging | Đánh Giá Thiết Bị & Mẹo (9 Best Camera BackPacks For Travel & Vlogging | Gear Review & Tips)
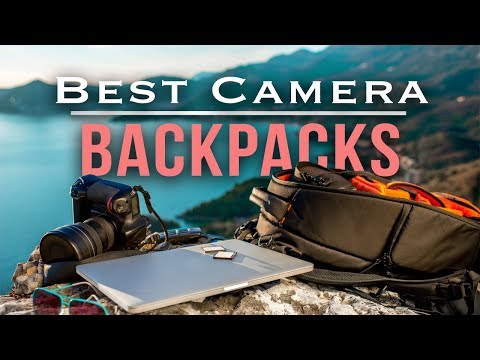
- It's got a lot of padding, and it's a very casual looking backpack.
Nó có rất nhiều lớp đệm và trông rất casual.
- It's got a lot of padding, and it's a very kind of casual-looking backpack.
Tuy nhiên, một điểm trừ của chiếc balo này là túi đựng máy ảnh có thể truy cập từ phía sau.
Đánh giá Túi Tote Catalina Supreme và Ba lô Westholme của Lo and Sons - Cập nhật Rowledge! (Lo and Sons Catalina Supreme Tote Bag and Westholme Backpack Review - Plus Rowledge Update!)
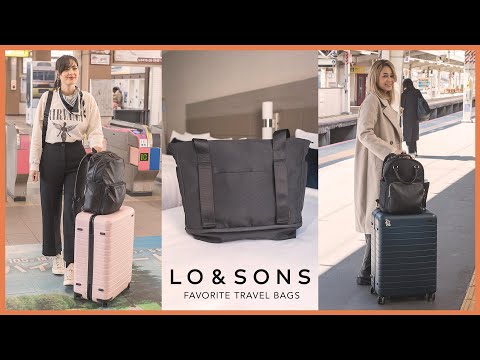
- I've never had a problem where I felt like my shoulders hurt with this backpack because the padding is really nice on this.
Tôi chưa bao giờ gặp vấn đề nào khiến tôi cảm thấy đau vai khi đeo balo này vì lớp đệm của nó thực sự rất êm ái.
- I've never had a problem where I felt like my shoulders hurt with this backpack because the padding is really nice on this.
Tôi cũng có một thiết bị sạc cho điện thoại và đồng hồ Apple của mình.
Chấm dứt yêu xa, Căn hộ mới và cú sốc văn hóa ngược của vị hôn phu người Nhật của tôi // Tập 22 (Ending Long Distance, New Apartment, and my Japanese Fiance's Reverse Culture Shock // Ep. 22)
- We'll put padding here.
Chúng ta sẽ đặt đệm ở đây.
- We'll put padding here.
YESSTYLE ĐỢT HÀNG GIÀY BÁN CHẠY NHẤT Thử đồ! Có đáng tiền không? (YESSTYLE BEST SELLING SHOE HAUL Try-on! Was it worth it?)
- I feel like the padding inside makes a huge difference.
Chúng sẽ đau chân.
- After about an hour of walking around, I feel like the padding inside makes a huge difference.
Sau khoảng một giờ đi bộ, tôi cảm thấy lớp đệm bên trong tạo ra sự khác biệt lớn.